Tuesday, December 4, 2012

Ponds!

This is going to be a pretty photo heavy post, so give it a bit of time to load.

One of the big projects started back in August of 2010, building of two ponds. Not lakes, or huge water, but big enough for fish and swimming. There are several springs that run for most of the year and feed them.


The site stripped of topsoil (which was stockpiled for later use). Amazing to see these photos from just over two years ago and to walk out and see what it looks like now.


The beginning of the pond, and foreshadowing of tribulations to come in the presence of a lot of rock in the soil/clay.


The upper pond, complete! The white pipe on the right is a dry hydrant. The tall white pipe is the drain, setting the water level. The black pipe against the far slope is the pond drain. Both ponds are 12+ feet deep.


Lower pond, also complete! This pond gets the vast majority of it's water from the upper ponds drain/overflow. So if the upper pond does not fill fully, the lowers water level will be very very low.


Seed all grown in. Looking good, but the water level is a foot or so low, as the drain pipe is sticking out of the water by that amount.


Hmmmm, upper pond also low and not filling anymore. It seems the upper pond, despite water coming in was not filling. So we drained the pond. Packed clay into an area where a seam of shale had been dug through and waited a season for the pond to refill. No luck, same problem. So the last possible solution was putting a liner in the pond so it can't leak.


The drained pond awaiting the lining! Rock piles were intended to be fish habitat.


First step is to strip the old interior and start with a solid base. A shelf was also dug around the edge of the pond. The Liner will have dirt placed on it there to protect the liner in that area.


The next stage is to lay very, very heavy fabric, basically very heavy landscape cloth, to protect the rubber liner.


Next the rubber liner is placed on the fabric and then another layer of fabric placed on top of that. Lots of protection for the liner.


All lined and very pretty, feels huge when walking on the bottom. This is when things got a bit dynamic. I started wondering why one would dump dirt back into the clean pond that was intended for swimming. One of the Envinity build crew suggested googling natural pool and that type of build made a lot of sense.

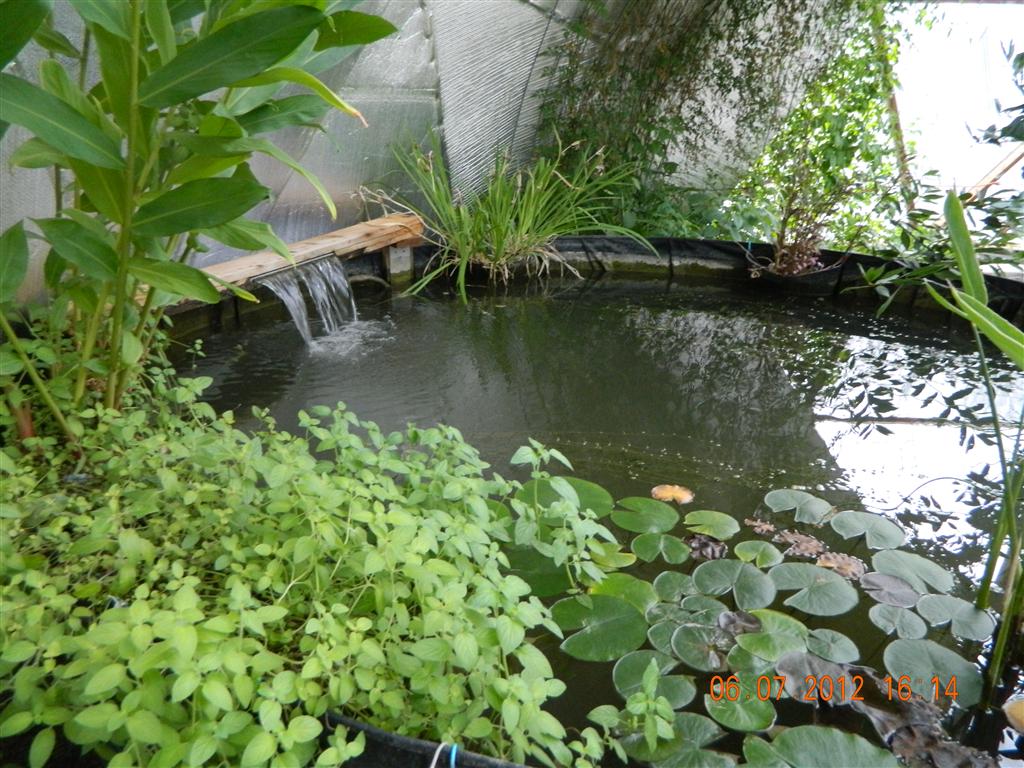
Basically one creates a shallow vegetative area for plants to grow in, by pumping water through that zone the water can be filtered. We create an ecosystem that promotes clean water and with luck filters it. 


A brick and block yard a few miles down the road was shutting down, so we picked up heavy masonry fire block on super sale.


The first layer of block has mortar to adhere a top row of block onto it. In that mortar is embedded a heavy plastic mesh, that will be buried under/in pond rock to keep everything held together.

On top of that we mortared a row of rock that I gathered from around the property.


The pond gravel back-fill being placed. We discovered that the cost by the tri-axle is only slightly higher than crushed limestone as many trucks are hauling gravel north to the shall drilling area of PA and were coming back empty, so adding the pond stone as back haul kept trucking costs minimal.


Getting there!


With grass!


 The water has been quite clear, there was some algal cloudiness in mid summer, but it faded rapidly as water temps fell in the fall. It will be very interesting to see what the water clarity is like in a few years.
  

It was awesome swimming this summer, it did stay cool and got downright cold rapidly in the fall, but I suspect will provide many, many years of swimming and recreating.


Our last step was to add fish! We added largemouth bass, sunfish, some sort of minnow and a few catfish to both ponds. Below the fish are bagged and adjusting to the water temperature.


Bag of minnows being freed!

Tuesday, September 11, 2012

Wilflife Annoyances..... Quillpigs and Great Horned Owls

Living outside of town brings lots of great and fun wildlife sightings, but occasionally they can be painfull, annoying or costly. We had three that we managed to photo-document recently.

First, a number of our young chickens were killed earlier in the season by a racoon getting into the pen.......


This lead to a pen improvement project. We put in corner posts so the electric netting could be tensioned, put in more supports to prevent sagging and reduce gaps under the fence, put down landscape cloth covered by 10mil black plastic to keep weeds back, overlaid that with river stone and filled gaps with larger rocks.


This seemed to mostly be effective. We may have temporarily trapped a possum inside and we have a few more improvements to make, but we thought we were over the hump. Then death reigned. Young turkey started being slaughtered or disappearing almost nightly. The kill patterns were odd, some coon like, some maybe Tom turkey kills, some none of the above. A full sized chicken (who had taken to roosting outside with the turkey) was found dead in the pen, so we set a trailcam up on it and found......


Death from the sky! Two great horned owls appear to be the primary culprits in the latest batch of fatality. Only thing still outside are full sized turkey, not sure if those are even slightly safe, but penning them isn't very practical, may have to put bird netting over their perches if they start to get taken.

Lastly Loki and Nixie (In a last outing prior to Loki moving to Iowa) ran into a quillpig and came out of it worse for wear. I had though Nixie had learned to leave them alone, but apparently the pack hunting instinct overrode common sense and vet visits were the result.......


I find this picture fascinating, the quills coming up just behind her nose were driven through the roof of her mouth, through her nasal cavity and up and out from the inside. I asked the vet about it and he said it was not possible as the quills would have had to have penetrated the hard pallet. Luckily google has a better education than the vet and I was able to find the below skull image of the roof of a dogs mouth. Two holes (foramen in medical jargon) towards the front of the mouth allowed the quills to be driven all the way through. You could look into her nose and see quills sticking up like stalagmites. It's now three weeks later and I'm still finding occasional quills emerging here and there, but it seems like we are getting to the end of them and she's happy and active.


You can't see it in the pictures, but her mouth is full of quills.


Loki got off easy, Chelsea managed to get 53 out (mainly from his leg) and only 18 or so were left for the vet. to remove. Three days later the trailcam caught the potential source of their discomfort walking around the poultry pen.


With a bit of luck we will stay away from the negative wildlife encounters for a while.


Thursday, June 7, 2012

Greenhouse

One of the major features of the compound is the greenhouse. This was installed in fall of 2009. We went with a passive geodesic system that comes as a kit. You can hire an experienced installer from the company that makes the kit to assist/lead the build. It's made by Growing Spaces and is 33' in diameter, about 700 square feet.

The features of this particular greenhouse that sold me on it was the maximization of passive design. A reflector on the north wall focuses low angle winter sunlight on a +-7' diameter pond/pool inside the greenhouse. The pool is warmed in the daytime and cools, releasing the energy at night, pretty much preventing any freezing even here in central PA. A small pump and waterfall keep the water oxygenated (and the goldfish happy) and prevents temperature stratification. It also has small fans that circulate warmer daytime air through 4" tubes under the soil, keeping soil temperatures warmer. It has automatic temperature controlled vents and drip irrigation from Dripworks so it's self watering and self thermo regulating.

This allows growing of cool tolerant plants into and through winter (though growth slows a lot when solar energy is low). Also enables growing of things like tomatoes and peppers earlier (and peppers love the greenhouse). It also allows growing a few things that would not live in this zone, such as a bay leaf tree and some Jasmine.

It's also a peaceful and nice place to garden and work, even in winter.


The stem wall goes directly on packed gravel, no foundation needed.


The higher framework is built working off of scaffolding.


First piece of glazing is going up.


Shell almost complete!


The north wall reflective material is stapled into place.


Clay drilling the holes in the sheet metal that will be painted and bolted together to form the water tank/pond. 


Painted!


 Together and lined!


 I used landscaping blocks to build the walls of the beds inside the greenhouse.


The crew post build! Dad was super instrumental as always, Chelsea did an immense amount of the build work, Amanda and the Growing Spaces crew round out the major players! 


Together! The pink insulation board was eventually buried, it's one more piece of protection against freezing.